The making of this blog, part 9 - Separating services and adding caching
We have to use two servers instead of one when using free tier products, and caching makes us go fast
2022-11-20python web making_of flask gunicorn docker nginx cloud analytics shynet certbot oracle server caching
To catch everyone up, at the end of the last post I had set up analytics to run on the same server that serves my site, by updating the Docker container situation to include what Shynet needed. This worked, but had some downsides.
The Downsides
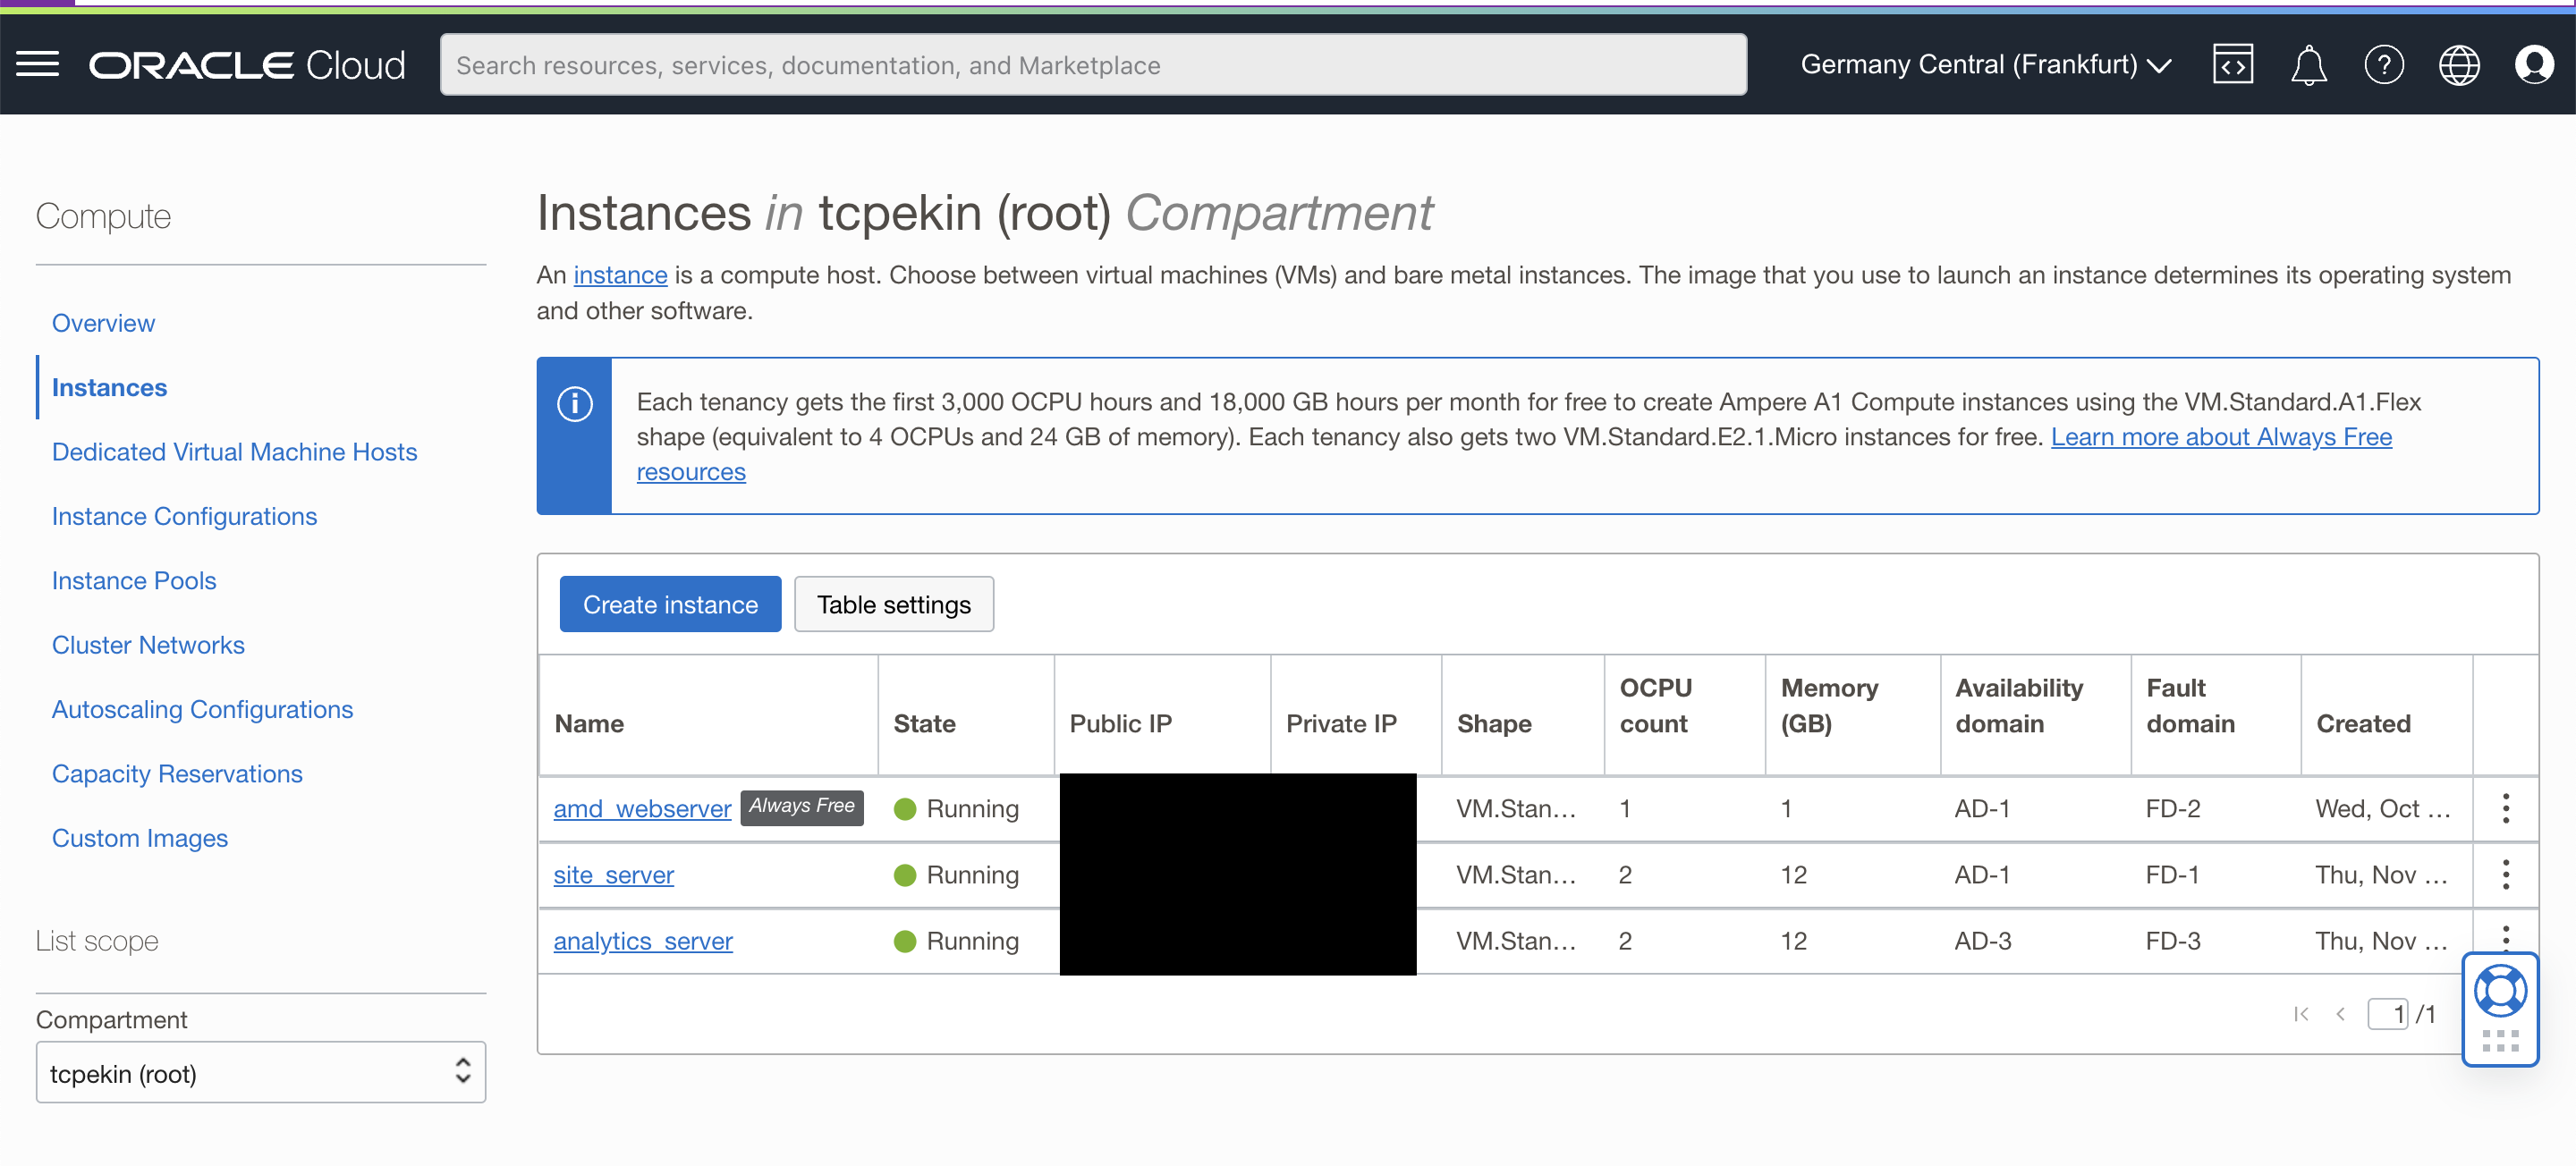
As a reminder, I run this site on Oracle's free tier, and both the site and analytics were running on their AMD offering. However, this instance has 1 CPU (actually they say 1/8 but I don't know what that means), 2 cores, and 1 GB of memory. This just wasn't enough. While running both services, I could noticeably see that the site was running slower, and analytics took a very long time. Therefore, I decided that a good way forward would be to split the analytics onto their own server, and keep the blog where it was.

Oracle's other offering
The first time I set up an instance, I just used the one that seemed the most like what I knew, with the specs described above, mostly because they didn't mention anything like CPU Hours and promised just actual physical hardware.
However, Oracle offers a lot more than just 2 instances with the above specs. When I logged into my instances dashboard, they write:
Each tenancy gets the first 3,000 OCPU hours and 18,000 GB hours per month for free to create Ampere A1 Compute instances using the VM.Standard.A1.Flex shape (equivalent to 4 OCPUs and 24 GB of memory). Each tenancy also gets two VM.Standard.E2.1.Micro instances for free. Learn more about Always Free resources.
I decided to see what this was all about, and created an Ampere based instance.
Creating an instance
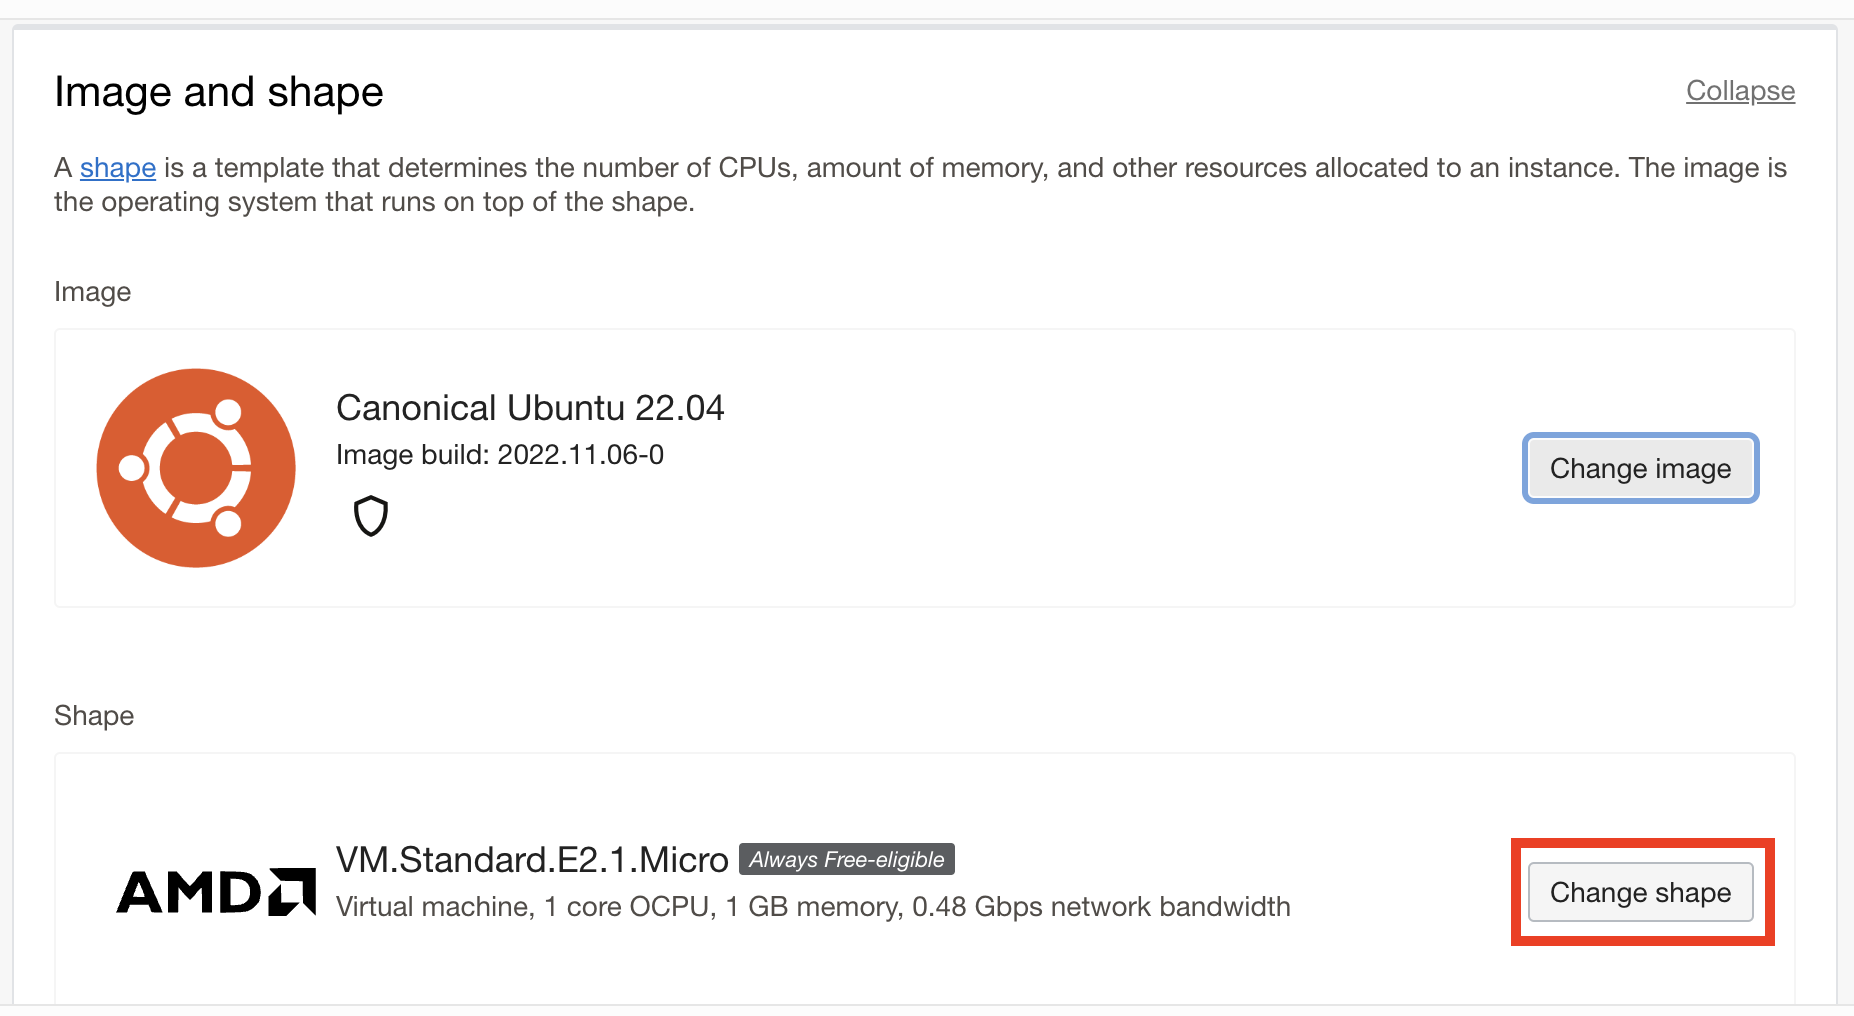
First, I went to my Oracle instance dashboard and clicked the "Create Instance" button, seen above. This takes you to a page in which you can customize the instance. However, for the purposes here, we only want to modify the instance's image (which OS it runs) and shape (what resources it has). The section on the configuration page showing an AMD instance with Ubuntu can be seen below.
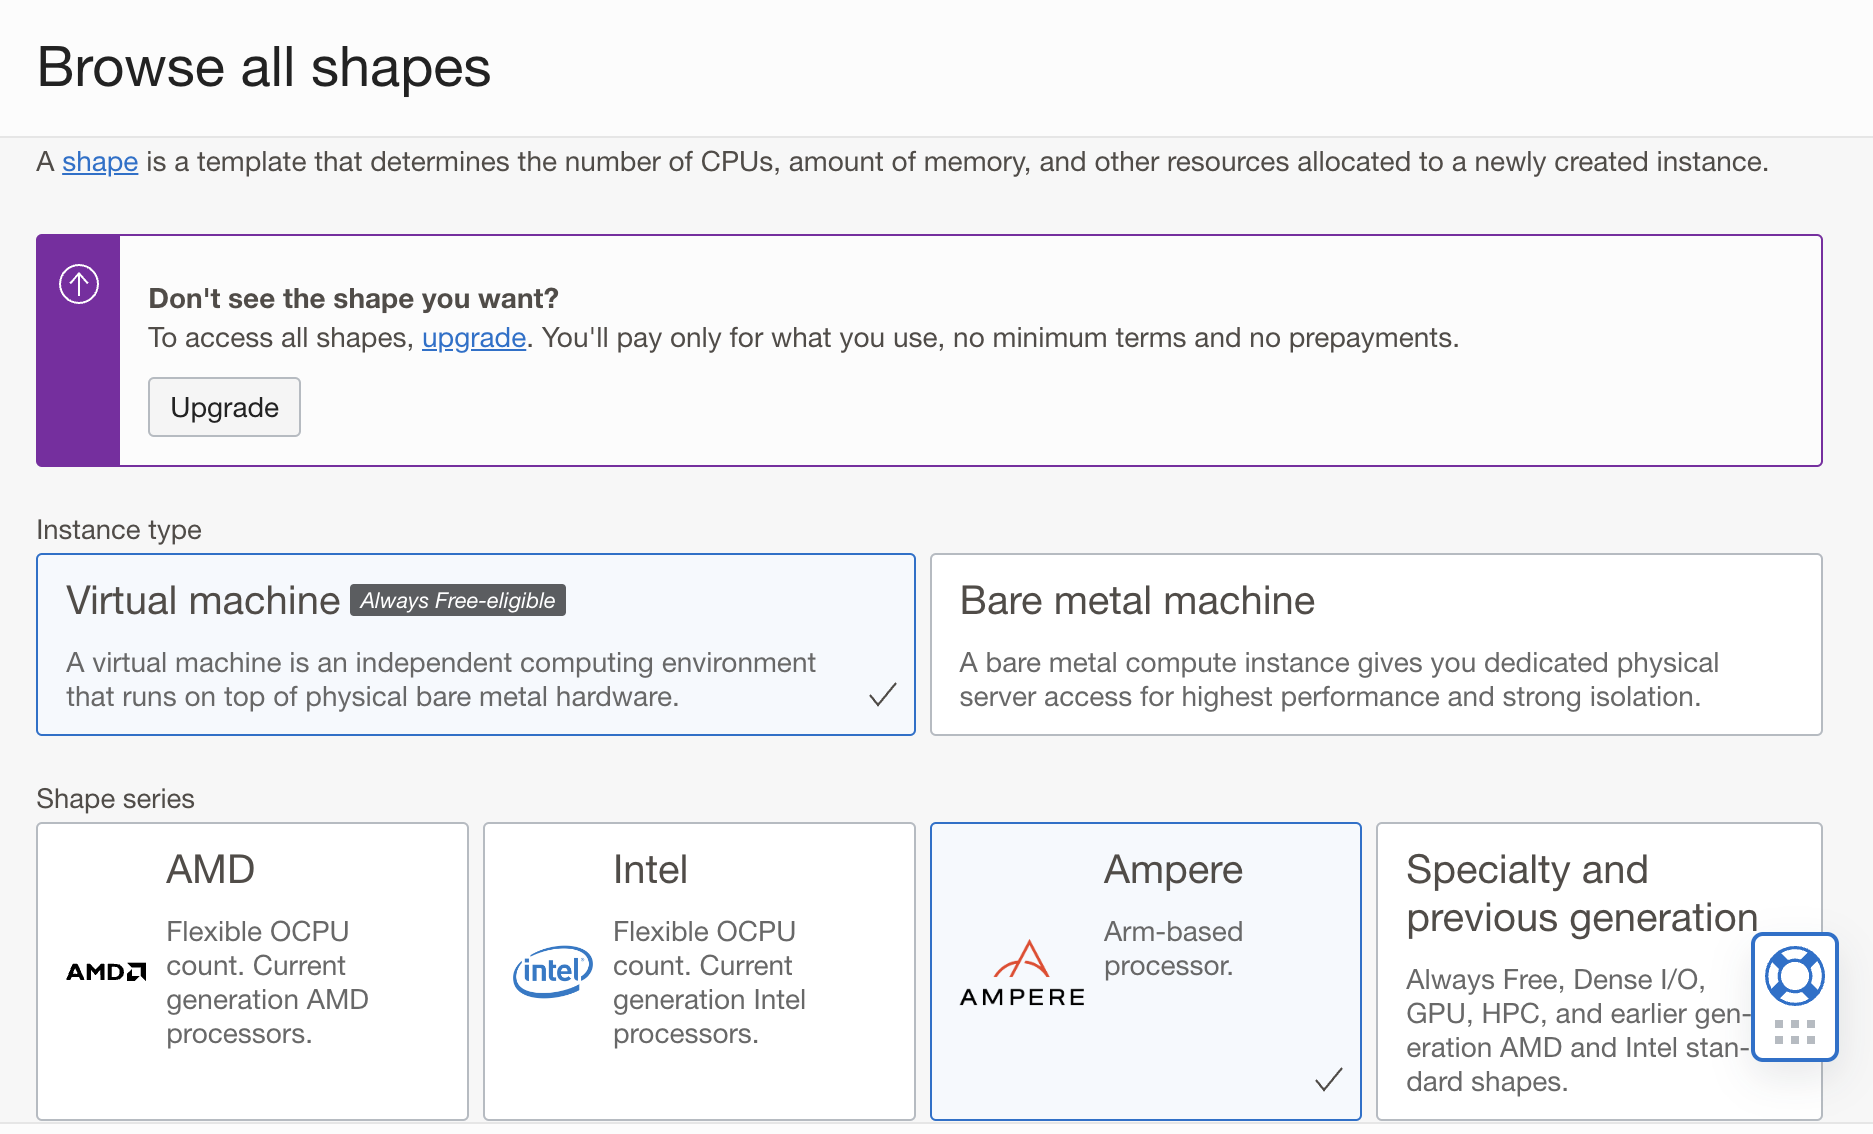
Clicking on the "Change Shape" button brings up the following screen:
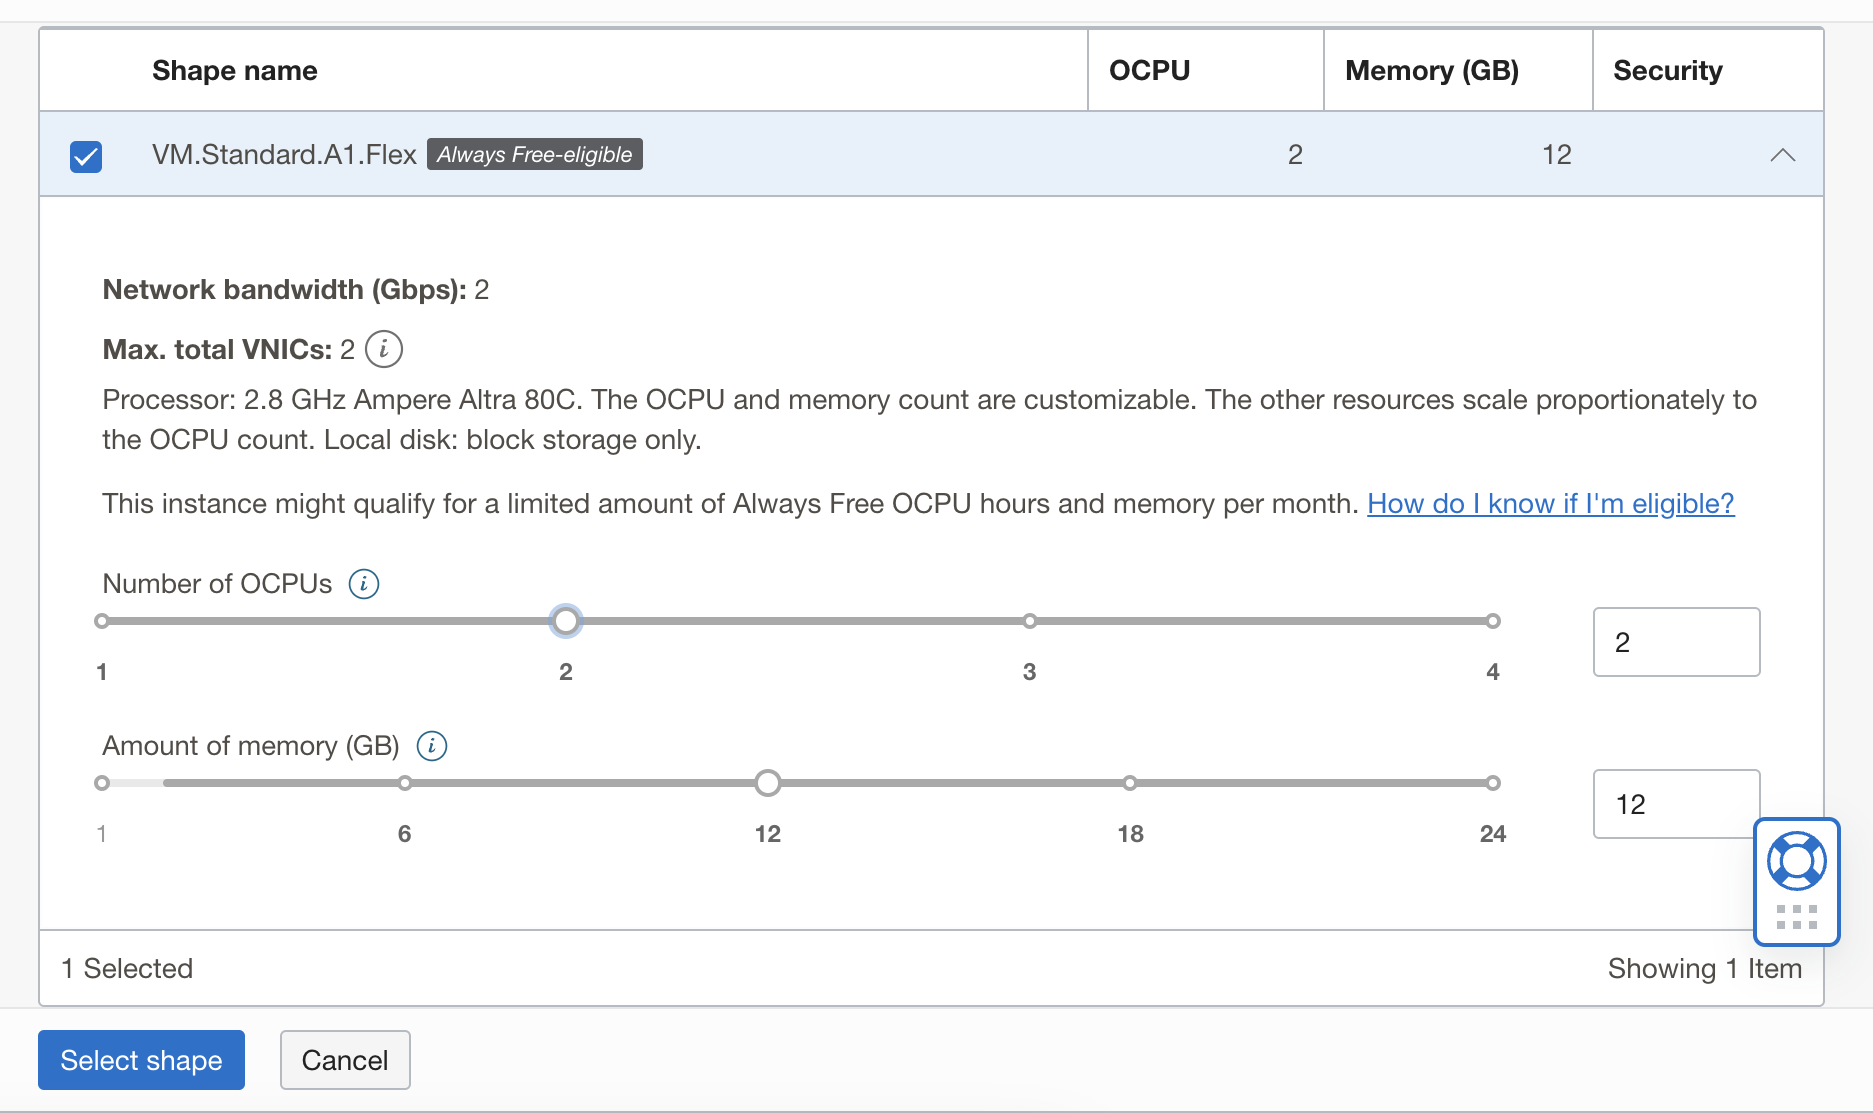
After specifying the configuration, you download the SSH key (as previously mentioned), and you have a now much more powerful server!

Setting up the analytics server
Setting up shynet was much easier when it had it's own server. I mainly followed
the documentation pretty much exactly, and added certbot to manage HTTPS,
which was a pain. I had the same problem with 0001 being appended to
certificates' names, which was fixed the same was as it was
before.
Ampere footguns
However, all was not initially very easy - changing to an Ampere based instance
brings about one big change that still is a bit confusing to me, and that is the
change from an x86 type processor to an ARM processor. Luckily, I'd set up my
site with Docker, but I had to jump through a few hoops.
It turns out that certbot needs a different image -
image: certbot/certbot:arm64v8-latest to deal with the ARM platform. I am not
sure how you are supposed to know which image is the right one for your
service... but this is the one that worked. There are various names that seem to
be different for same platform architecture, so if anyone has a good explainer,
please let me know. But there seems to be aarch64, arm64v8 (which is maybe
the same thing), armv7l, and amd64 (the normal x86 one, I think). I do not
think that is an exhaustive list.
As a side note, I wanted to move the webserver to one of these Ampere instances
as well, but a lot of the smaller Python packages aren't compiled for the ARM
platform via conda. I think one of the main ones that held me back was
pymatgen, which is essential for diffraction pattern simulation, and so I had
to keep the site on the AMD offering. In the future, it might make sense to
compile my own version for the ARM platform?
Cleaning up my blog code
Removing shynet on the blog instance was very easy - I deleted the nginx blocks,
removed the docker compose section and it was done! One big perk of Docker
right there. This was much more performant - the site ran smoothly and so did
the analytics. No more long wait times for those and the site was almost ready
to go live. The changes can be seen
here
Odds and ends
Some things still needed to be improved, namely handling input that is not allowed, and caching of the structures and images, such that common zone axis diffraction patterns do not need to continually be recomputed.
Handling bad input
The allowed input is a string in the form of mp-#### and a zone axis, that can
be three numbers, comma separated or not. If the numbers are not recognized,
they are simply replaced with 1,1,1, and the input string has to have the
mp-# format, or it isn't even allowed to be input. However, a user could put
in a Materials Project string that isn't valid.
In this case, I modified the code such that a message is passed to my HTML
template, which is only shown if success is False. The message is simply the
response from the Materials Project API, if it can't find the structure. The
changes can be seen
in this commit.
Caching images and structures
The main gain really came from caching the diffraction pattern images once they
had already been computed once. That was done in
this commit,
where you can see I added some try/except blocks that first build the desired
path given the input (each input has a corresponding path), and then if the file
exists, sends it using Flask's send_from_directory function, which
should
prevent insecure exposure of my filesystem to user input.
When that throws an exception, then the necessary images are created, saved to a
path, and the SVG Response is returned. I guess that after I saved the image,
I could again use send_from_directory, but it feels cooler to send a bytes
Response with the correct mimetype. Probably b/c I don't fully understand
what's going on.
I thought I was done with this point, but there were still two more optimizations that I realized I needed to make. The first was caching the response from the Materials Project. Prior to this commit, I was using py4DSTEM's functionality to query the database/API for me, instead of making my own request. However, this meant I needed to wait to query it two times before plotting, causing diffraction patterns to be very slowly generated.
To remedy this, I wrote a new function get_mp_structure that uses the same
try/except logic as above with the images, but instead looks for a MP
structure file (as a JSON) and tries to load it, and when that fails, the JSON
file is (re)downloaded from the MP and saved to my instance. Then, the functions
that plot the images can call get_mp_structure, and when it is on the
filesystem, the whole process works much faster.
I also realized occasionally that the plotting functions would fail, and in that case, save a malformed SVG, thereby causing an error. I realized that SVG is a form of (subset?) of XML, so I added XML parsing to my block of code that serves the image. When it fails, the image is recomputed and overwritten.
Finally, in a very important step, I exposed the volumes inside my Docker container to the server, with the following code
1 2 3 | |
so that if I ever had to restart the server (which I do every time I make a post), the previously downloaded and written files would persist.
There were a couple of other very minor changes, mostly for rendering the zone axis orientation, but the site was now, in my opinion, ready to go.
Site went live!
With this done, I shared the site via email to a few people, and also within the NCEM py4DSTEM Slack channel (a great resource - email for me for access if you're interested). This resulted in Colin tweeting out a link:
Check out this cool online diffraction pattern simulator from @tcpekin! https://t.co/FIDG5lijBU
— Colin (@ColinOphus) November 4, 2022
Powered by py4DSTEM (https://t.co/Nh4dmxB2zf) pic.twitter.com/mlMw47a9WG
which then drove a lot (by my standards) of people to my site!
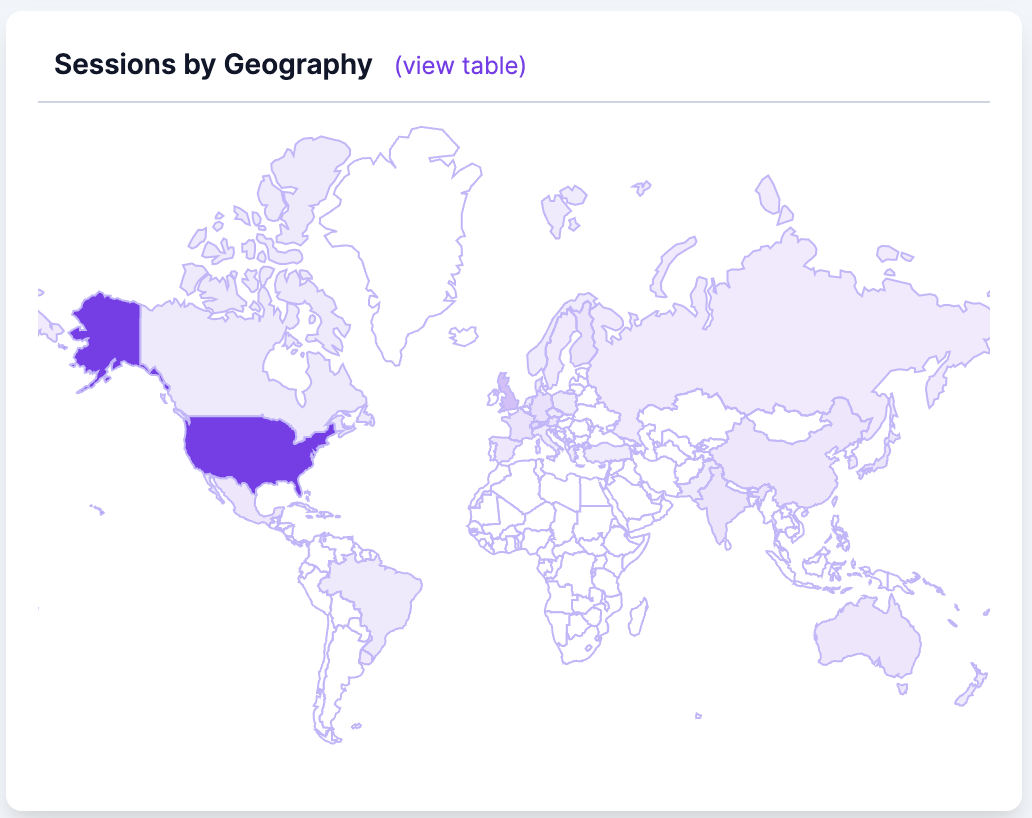
Feedback so far has been uniformly good, lots of likes on Twitter, and people visiting my site from all over the world! That's been the most exciting part, seeing computers from India, the US, Australia, Brazil, Uruguay all visiting and at least checking it out.
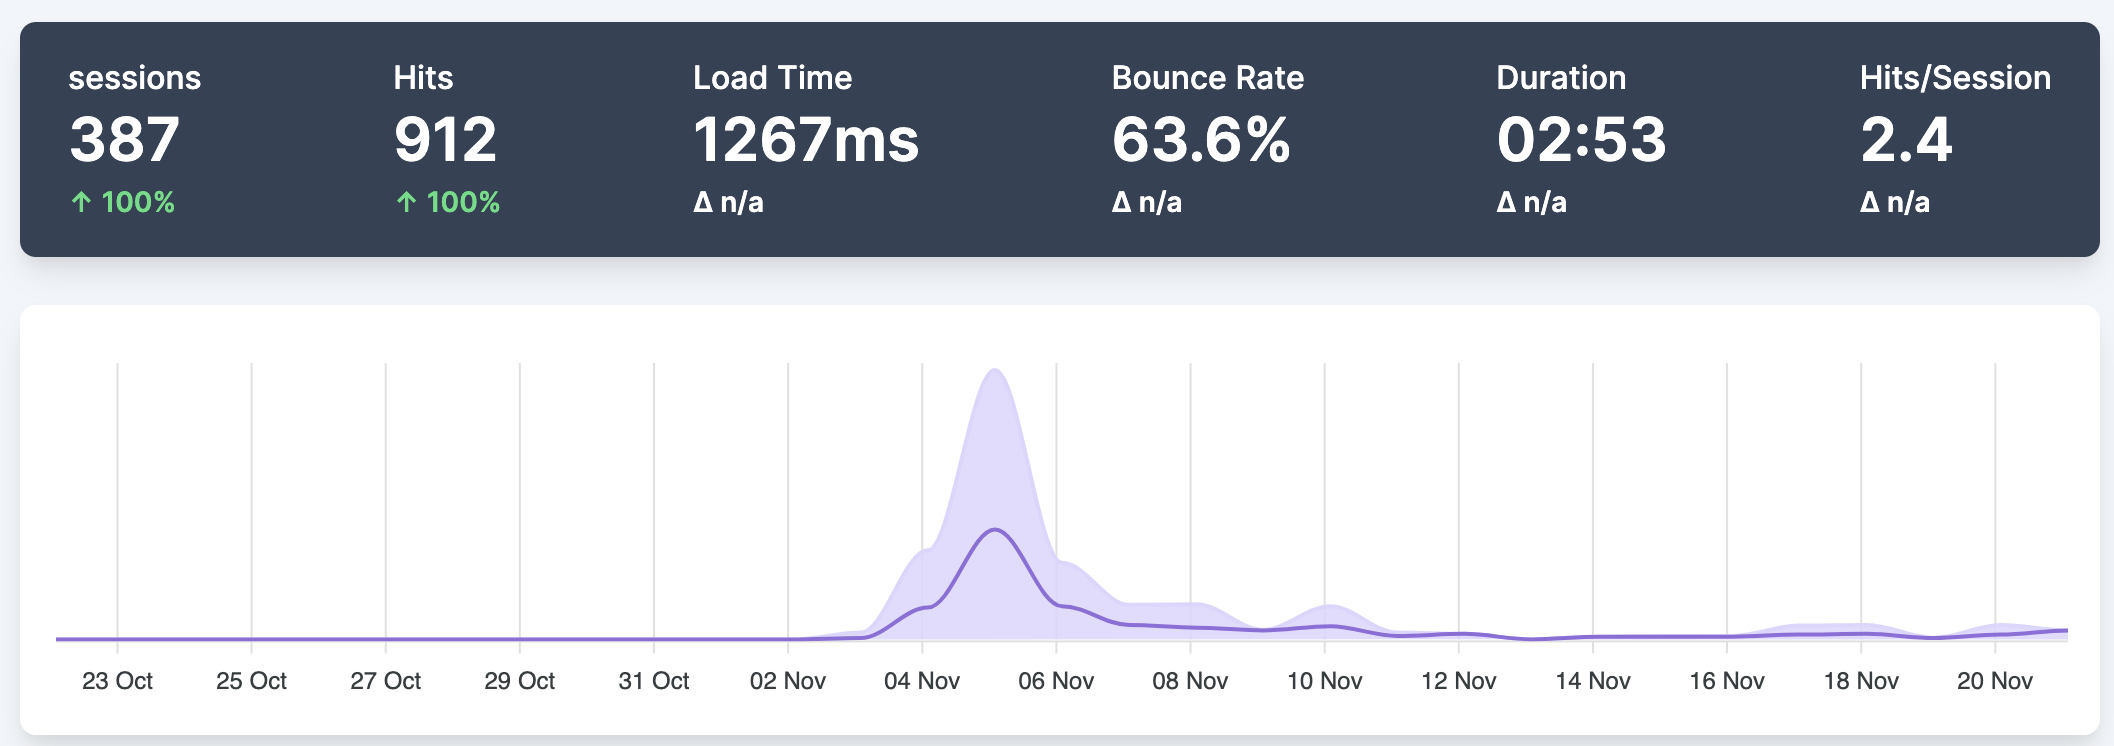
Anyways, it all worked, site never crashed (honestly think I'm a long way from that...), and other people seem to think it's useful! All in all a great success. People are still using it, on the order of 1-2 a day, and actually generating diffraction patterns. I'm very happy I was able to make something people find useful and continue to use.
Conclusion
No real conclusion here - I was stoked the site works!
In the future, I'd like to shift blog to a different Ampere instance, once I figure out about running my diffraction code on an ARM processor.
I also don't know how HTTPS certification will go in the future - not sure if I
set up certbot correctly for now having two instances, but we'll see how it
goes if and when it fails.
I also would like to set up nginx to serve the static file first, and then if
it doesn't work, use Flask to generate the images. I think it would be a lot
faster and more robust in that case.
Finally, I probably need to slowly add features and continue to "market/promote" the simulation. I think people will use it, but need to be reminded maybe 3-4x per year that it exists. On that front, I'd like to make a diffraction pattern library, like a textbook index, for the most common diffraction patterns that have a lot more information (angles and g1/g2 ratios, initially). Then, one day I'd also like to have the angles and g1/g2 ratios automatically computed and tabulated and shown underneath the simulation.