The making of this blog, part 7 - HTTPS is so hard
How to set up HTTPS - is it impossible?
2022-10-26python web making_of flask gunicorn docker nginx cloud https certbot
Once upon a time, this site was running (just fine, I might add) using HTTP. I don't currently do anything with user data, outside of getting crystal orientations and ids in the URL, so I initially tried to hold off on the thought that HTTPS was necessary to be a real website.
Then I showed the site to Max, a friend of mine who somehow has already done everything web related that I've talked about so far, years before me, and he sends me this:
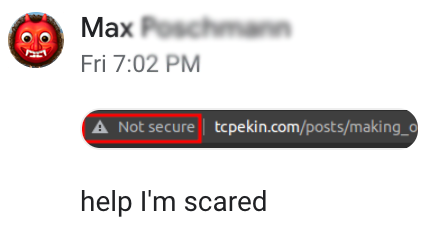
followed by his site
and a thinly veiled threat that his site was going to beat up my site:

That does it... now I have to add HTTPS.
Adding HTTPS, take 1
First off, what is HTTPS and what is it good for? Take it from Cloudflare as to why sites should use HTTPS. In my case, implementing it
is to secure my users' data- I am my only useris to make me feel like I have any idea what I'm doing on the web, thereby quelling my imposter syndromeis to keep my site safe from Max's- there is no competing with Heroku- is for general knowledge - I can successfully Google things 🎉
- has no purpose but seems like a cool thing - your definition of cool may vary
With that in mind, right after I registered my domain, I saw that you could download a SSL certificate bundle and use it to secure your site. Thanks Porkbun, that sounds like exactly what I wanted!
Turns out, that wasn't what I wanted. Certificates expire and have to be renewed every so often, and if you forget about that, your site will look scary again, meaning you're constantly checking Porkbun or your site for an expired certificate. And then, when it expires, immediately you have to download the next one and manually move it to the remote hosting server, to keep your site "safe". It seemed like there should be a better way.
What was done before
A long time ago, the web was a collection of text files, and certificates that you needed for HTTPS were sold by companies... or something like that. They cost money but people used HTTP and were happy in their ignorance. That was me. I was happy not knowing anything about this. Anways,
Enter Let's Encrypt and certbot
Let's Encrypt brought the internet out of its dark ages, providing free HTTPS certificates for anyone who asked. Internet scams and spammers were forever banished from the World Wide Web and the people rejoiced.

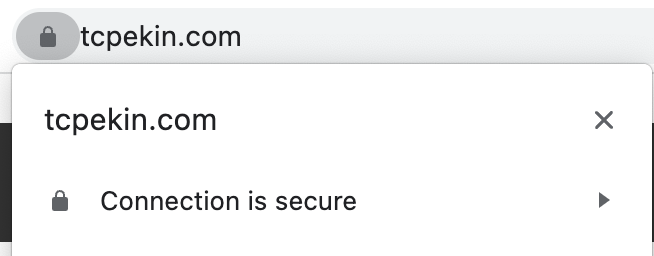
Anyways, the major browser internet companies agreed with Let's
Encrypt that internet safety was a good thing, and therefore put the big locks
on the address bar (see above) if your site was HTTPS. I am 100% sure that no
non-tech user ever even looks for it, but at least it's there. Look at the 🔒
people... please.
In order to make the transition to HTTPS less painful, Let's Encrypt/the
Electronic Frontier Foundation provides a very handy bot that helps with the
HTTPS set up, called certbot. Certbot promises an
easy way to set up HTTPS in collaboration with Let's Encrypt, so I started to
play around with it. Ideally, you can put in the server (nginx) and Linux
distro (Ubuntu 20.04) that you're using into the home page and it just tells you
which commands to run, and certbot then modifies your nginx configuration
file, downloading the files you need, performing the authentication, et voila,
you have HTTPS.
I tried this for about a day before I realized this wouldn't work.
Docker enters, menacingly
Why doesn't the straightforward approach work? In one word, Docker.
Before going down the route of setting up HTTPS, the structure of this site's
Docker configuration didn't really need to interact with the outside world (in
the form of the server that the code was running on). I didn't really have
logging set up, and after I had set up nginx and Flask, I didn't think I
needed any more containers.
That proved to be false - in order to run certbot, such that it can renew the
certificates itself, it needs to be in a container, and the certbot and
nginx container need to be able to talk to each other, in the form of volumes.
Volumes are just directories within containers mapped to each other, or mapped to folders on the host system, such that an update in one container can be seen in another.
After banging my head against the wall for another day trying to get this work
from scratch, I totally gave up on that. There seems to be a chicken and the egg
problem - to get a certificate from Let's Encrypt, since our Docker containers
are behind nginx, we need nginx to run to get our certificates, but nginx
won't run unless it has a certificate... so how do you get the first
certificate?
The solution is to use this blogpost (also repeated below), and use the script they provide in order to get around that for you. The script can be found in the repository for my site as well.
Note a few changes from the blog post - my data_path in the shell script is
instead services/certbot, and I've added --no-eff-email to the options when
getting the certificates, to minimize user interaction.
Updating the docker-compose file
The
docker-compose file
needed some updates to make this work, partially reproduced below.
1 2 3 4 5 6 7 8 9 10 11 12 13 14 15 16 17 18 19 | |
This generally follows what happens in the blog post, with a few differences.
First - I have a Dockerfile in my nginx services folder, in which I copy in
the nginx.conf file, so I build my container rather than just clone the
public image like in the blog post. In doing so, I also do not mount a volume
that links the conf files, as my Dockerfile copies it into the correct
location.
Note that there is a new port mapping (443, for HTTPS), and that the volumes
that are mounted between the host:container are the same for both the
certbot container and the nginx container. This is how they will be able to
give each other files. Finally I added depends_on: nginx in the certbot
container, so that it wouldn't try to start until nginx was running, as I
thought that might cause some problems with the order of operations.
Updating the nginx.conf file
The
nginx file
also had a lot of updates done to it, to make it compatible with HTTPS.
1 2 3 4 5 6 7 8 9 10 11 12 13 14 15 16 17 | |
In this first part, where we handle HTTP requests on port 80, we essentially
just redirect everything internally to the HTTPS version of the site using
nginx variables $host and $request. However, we have to add the next
lines, where we handle the acme-challenge to authenticate our site. This would
be the source of all our future problems. Finally, I added based on some forum
somewhere (link below) the default_type as plaintext.
One interesting thing that I will have to take advantage of more in the future
when setting up better static file routing is the
root variable
in the location block. When that is part of a location block, URLs that
match that block will have their request prepended with root. That means when
the authentication procedure looks for something in the acme-challenge folder,
it will look for matching files in
/var/www/certbot/.well-known/acme-challenge/filename (which is mapped to
./services/certbot/www on our host filesystem) instead of
https://$host$request_uri. This is how certbot and nginx get the files in
the right location for each other.
1 2 3 4 5 6 7 8 9 10 11 12 13 14 15 16 17 18 | |
This next block handles the HTTPS requests - it is almost directly the same as
what was in the blog post that inspired this adventure, but the only thing that
changes is that the there is a reverse proxy, and I have previously defined an
upstream, so I can just use http://flask_site/ as before. Most everything
else that looks new was added just following the guide and is just links to the
new required SSL certificates.
This is pretty much the extent of the files that needed to change
Actually getting the certificates
Now came the fun part - how to actually get the certificates. First off, I found
this very hard to test locally. Most of the time, I like to try everything
locally (one of the advantages of Docker), and then when I have to go to the
server, it is very easy to ssh in, git pull the code, and just restart the
Docker containers.
This doesn't really work with localhost. Let's Encrypt has kind of a
workaround for
testing, but that doesn't really work when the task itself is to fetch said
certificate. So I had to do everything remotely on my very poor (but trusty!)
Oracle instance.
How hard could it be though - like the blog says, once you're set up just run
sudo ./init-letsencrypt.sh and we're good to go!
We are not good to go
This is a pretty common theme now. I run the .sh script and... I get a variety
of error messages, first of the variety that the dummy private key could not be
written (no write access), then that the certification bot could not access the
necessary files in the acme-challenge folder. This continued for hours. The
first thing I checked were the files that I had changed, but nginx.conf and
the docker-compose.(dev/prod).yaml both looked ok.
With regards to the first error, I thought it might be a problem with file and
directory permissions. Lo and behold, when I ran ls -l services/certbot, I saw
that some directories were owned by me, tompekin while others were owned by
root, a consequence of running the init script with sudo. So, I switched to
running it as myself, not sudo, and it worked!
However, then the second error occurred (reproduced below):
1 2 3 4 5 6 7 8 9 10 11 12 13 14 15 | |
So, someone is looking for a specific file, but is not able to find it! This of course won't work when I'm working locally, so I ssh'd into the server, reran the init script.. and it still failed 🤦♂️.
At this point I was afraid of rate limits, so I set staging=1 in the init
script, which means that there is no real rate limit, but also (to my
knowledge), you can test the authentication, but you don't get delivered the
final certificates you need. Good enough for now.
If you look at the error, the certifier is looking for a file in the
acme-challenge folder, that should be generated by certbot. My first thought
was that, since that folder was empty after running the script, the file was not
being written. This took a while to figure out that no, that was not the case
and that certbot
clears this directory
upon completion. Just normal info you find in a StackOverflow comment 🙃.
So, I tried to look at what the log file was saying, requiring me to mount another drive (remember, everything is happening inside Docker), but that wasn't so helpful. I forget what it said, but it was kind of just a bog standard error message, but one that took 15 minutes to figure out how to even view.
Then, I just started poking around the certbot folder, wondering if it was a
sudo/root problem again. Sadly, very sadly after spending so much time on
this, it was. Looking at the subfolders and files inside of the
services/certbot directory (once again, created by the init script), they were
owned by root:root. To remedy this, I ran sudo chown -R ubuntu:ubuntu . to
recursively change everything to the ubuntu (default) user on the server,
reran the init script, and everything worked! I modified the docker-compose
file a little
(again, according to the
blog post I was following,
see previous two links for the changes), so that certificates automatically
renew, and we're done! Almost.
Final steps - certificates are appended with numbers 🤦♂️
When I ran the init script, it downloaded certificates for tcpekin.com-0001
instead of tcpekin.com, I guess because tcpekin.com certs already existed
from some failed run. This might have caused a problem during certificate
renewal, so after some searching around, I followed the steps outlined
here,
and all was gravy. The init script ran without a problem, followed by a
docker compose -f docker-compose.prod.yaml up --build, and the site now has
HTTPS!
But why was this happening
The question remains - why was this happening? Why was the init script, run
without sudo, creating directories with root owners? To the best of my very
limited knowledge, this is
expected
behavior. When a folder is created
with a root user in the container, it has the same permissions on the host
machine. That honestly seems like a dealbreaker for any sort of shared system
(high performance computing uses Apptainer instead of
Docker, and I wonder if this is different there), and a security issue. There
seem to be some workarounds, but on a machine that I fully control, I guess
chmod is good enough. But after shooting myself in the foot 1000 times with
permissions, hopefully I check that first next time. Or get into the habit of
using chmod in my Dockerfiles.
Conclusion
In conclusion, my site is safe. Maybe. I still haven't figured out if my forwarded header settings are correct (how to correctly set proxy headers and tell Flask how many there are is somehow very hard for me to find online), but now there is a lock in the URL, so bad guys beware.
In all honestly, this was much harder than expected, and took me like 2 days to
fully figure out. Maybe I'm just dumb, but in this case, Docker and nginx made
things much harder than a lot of the tutorials that I saw. I'm very happy that
one
blog post
exists, because it got me 98% of the way there, and I don't think I would have
made it otherwise.
I hope I don't have to deal with this again, but if I do, I hope I've given myself enough clues with the relevant git commits and this post. 🤞
Addenda
Line numbers in code blocks
I wanted line numbers in my code blocks, and luckily that is a common request -
I could modify codehilite in the Flask-Flatpages package with the following
code that I added to blog.py.
1 2 3 4 5 | |
Now I can say, in line 3 something happens, and nobody has to count 😎.
Fixing table overflow errors
Adding line numbers broke my code blocks 😭 - unbelievable how that happens.
Before, I was limiting the width of the pre elements that made up the code
block, but after adding line numbers, what actually happens is there is a two
column table, one column for the numbers and one column for the code. Each of
those were a pre element, and therefore the table was twice as wide. So, what
I had to do is remove the width restrictions on pre and instead add the
following code
1 2 3 4 | |
tables already had the same width specification as everything else, I just
had to let them scroll. And that's the state of the project 🗼.
Extra links
- Github for the bot that sets up
nginx+certbot+ Docker certification - Blog post for previous link, with more info - This was the most important link
- Let's Encrypt rate limits
- Let's Encrypt challenge types
- Troubleshooting on
nginxand Let's Encrypt validation - Getting
nginxandlocalhostto cooperate certbotdocumentation- Flask HTTPS notes, without Docker